

4.0
Owner's of the Cuisinart Blender SPB-7 gave it a score of 4.0 out of 5. Here's how the scores stacked up:

4
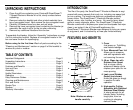
6. Locking Ring
Is self-aligning so that the glass blender jar slides easily into
position.
7. Heavy-duty Motor Base
Is so sturdy and stable, it will not “walk” on your counter –
even during ice crushing!
8. 7-Speed Touchpad Control with Indicator Lights
Is easy to use, read and clean. The red LED lights clearly
indicate what blender speed you are using.
8a. Pulse at Any Speed Button
Allows you to pulse at any speed from high to low, so you can
blend ingredients only as much as needed.
8b. Ice Crush Button
This button is preset to the best speed for crushed ice.
9. Slip-proof Feet
Prevent movement during use and prevent damaging marks
on countertops or tables.
10. Cord Storage (not shown)
Keeps countertop safe and neat by conveniently storing
excess cord.
USE AND CARE
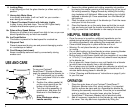
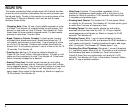
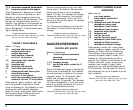
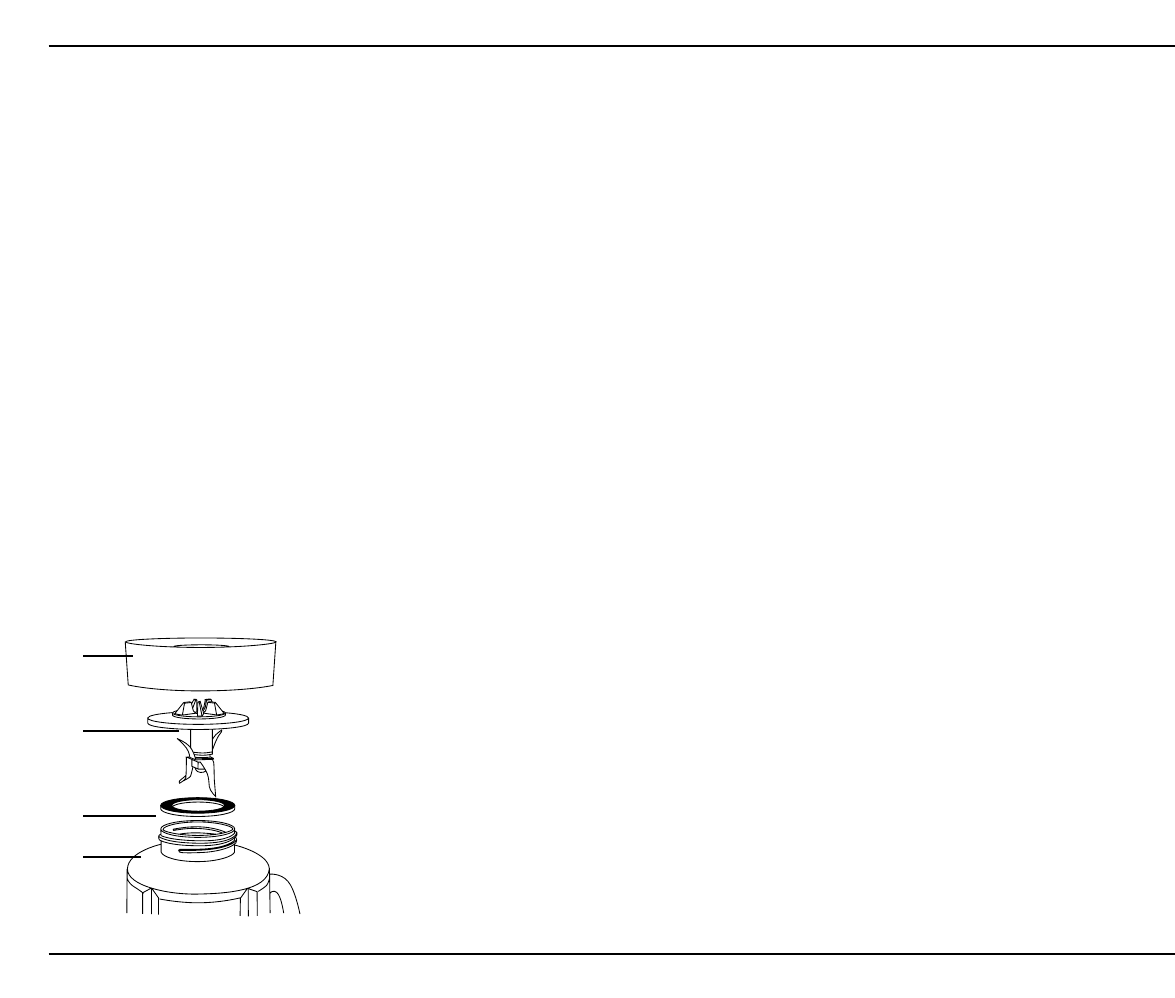
ASSEMBLY
To use your Cuisinart
®
SmartPower™ Electronic Blender,
begin by assembling the blender jar.
1. Turn the blender jar (a) upside
down, and place it flat on a stur-
dy surface.
2. Position the rubber gasket (b)
on the round opening on the
bottom of the blender jar.
3. Turn the cutting assembly (c)
upside down, and place the
blade end in the blender jar
opening.
Note: Blades are sharp…
handle carefully.
4. Secure the rubber gasket and cutting assembly into position
by placing the smaller opening of the locking ring (d) on top of
the cutting assembly. Engage threads by twisting the locking
ring clockwise until tightened. Make sure locking ring is tightly
fastened to blender jar. Once assembled, turn the blender jar
right-side up.
5. Push the cover onto the top of the blender jar. Push the meas-
ured pour lid into the cover.
6. Place the blender jar on the motor base so that the jar mark-
ings are facing you and the handle is positioned to one side.
7. Plug in power cord. Your blender is now ready to be used.
HELPFUL REMINDERS
• Once the cover is in position, additional ingredients can be
added during blending by simply lifting the measured pour
lid, adding ingredients, and replacing the measured pour lid.
• Cover should always be in place while the unit is on.
• Warning: Do not place blender jar onto base while motor
is running.
• Do not twist locking ring from blender jar when removing blender
jar from base. Simply lift blender jar from motor base.
• Boiling liquid or solid frozen foods (with the exception of ice cubes
or 1/2 inch [1.3 cm] pieces of frozen fruit) should never be placed
in the blender jar.
• Do not place ice, frozen foods or very cold liquids into a blender
jar which has come directly from a hot dishwasher.
• Do not place very hot liquids or foods into a blender jar which has
come directly from the freezer. Boiling liquids should cool for 5
minutes before being placed in blender jar.
• Follow “Cleaning and Maintenance” instructions on page 6, prior
to your first use.
OPERATION
1. Place the motor base of your Cuisinart
®
SmartPower™
Electronic Blender onto a flat, sturdy surface. It is important
that the surface be clean and dry. Assemble the blender by
following the assembly instructions. Once the jar is assembled
and is in position on the motor base, plug the Cuisinart
®
SmartPower™ Electronic Blender into an electrical outlet.
2. Add all necessary ingredients to the blender jar, and replace
the cover. You may add more ingredients by lifting the
(d)
(a)
(b)
(c)


Find Your Products By Category
Please Login
