
0
Owner's of the Cuisinart Blender CSB-78 gave it a score of 0 out of 5. Here's how the scores stacked up:


6
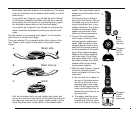
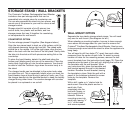
2. Attach/Detach charger handle
to motor body.
a. After batteries are fully
charged, remove charger
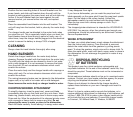
handle from wall socket. Push
down on thumb grip and slide
the plug to the retracted
position inside the housing.
b. Press the release button.
Align two slots on bottom
of charger with two tabs on
top of motor body. Press
together until you hear a
click and the two sections
fit together without gaps.
c. To detach: Hold motor body
firmly in one hand. Detach
charger handle by pressing
release button located at top
of motor body, then pull char-
ger handle away from motor
body by lifting up with other
hand.
Note: Detach the changer handle from the motor body
after each use.
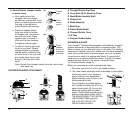
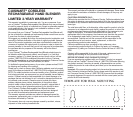
CHOPPER/GRINDER ATTACHMENT
A. Chopper/Grinder Prep Bowl
B. Cover Slots (3) for Attaching Cover
C. Metal Blade Assembly Shaft
D. Rubber Feet
E. Blade Assembly
F. Blade Ring
G. Plastic Blade Sheath
H. Chopper/Grinder Cover
I. Lift Tabs
J. Chopper/Grinder Spline
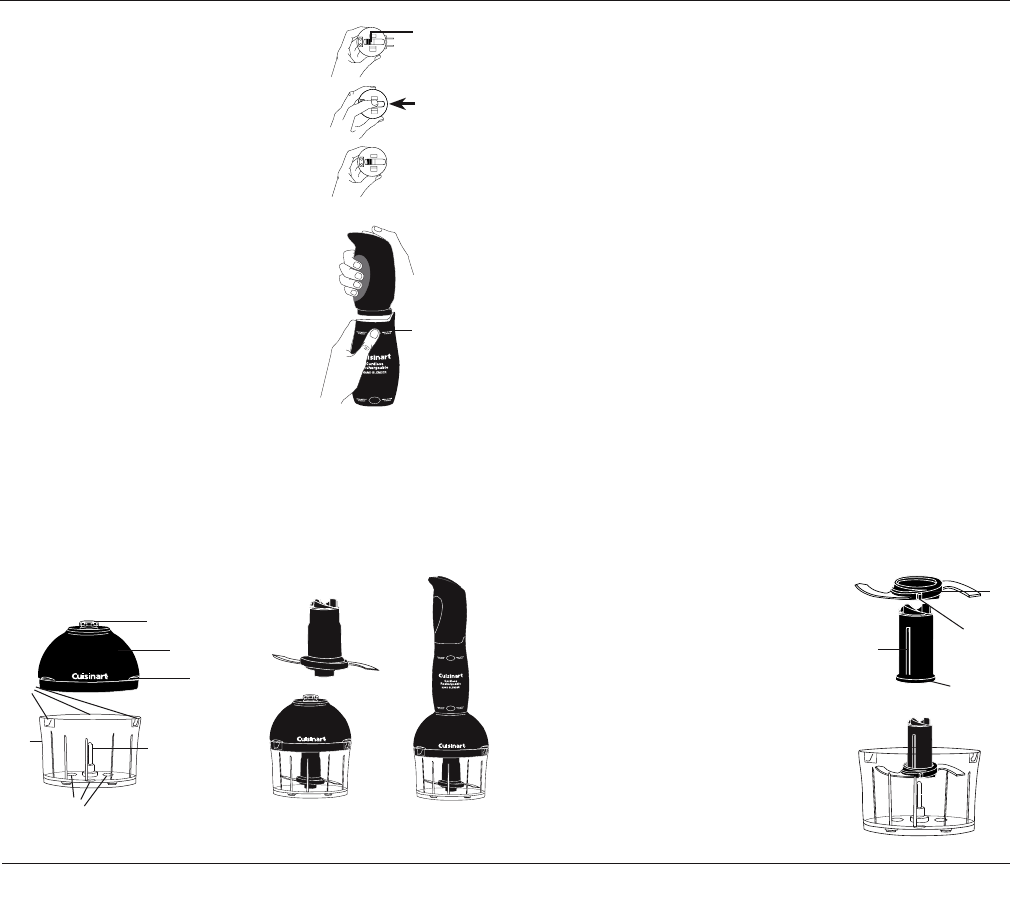
REVERSIBLE BLADE
The Cuisinart
®
Cordless Rechargeable Hand Blender chopper/
grinder attachment is equipped with a reversible blade. This
blade is sharp on one side and blunt on the other. The blade is
attached to a plastic ring which slides over the blade assembly
shaft, remove the blade to reverse edges, so it can be easily
turned over to select the appropriate blade. To remove this
blade twist in a counterclockwise motion. A guide for proper
blade selection follows in the section, Frequent Uses
for Chopper/Grinder (page 9.)
Before you process any food, assemble the parts.
1. Place the prep bowl on a flat, dry, stable surface.
2. The metal blade assembly shaft is attached to the bottom
of the prep bowl. If not already in
place, slide the fully assembled
blade assembly over the top of the
blade assembly shaft.
To put together the blade assem
-
bly:
Connect the blade ring (F) to the
plastic blade sheath (G). Line up the
blade ring opening with the plastic
sheath. Let the blade ring slide to the
bottom of the plastic sheath. HOLD
THE BLADE RING BY THE CENTRAL
HUB HOLDING RIBS (grips) (K)
ONLY. DO NOT TOUCH THE
RAZOR-SHARP BLADES.
A
B
C
D
J
H
I
E
F
G
Press
release
button to
separate
or attach
2b.
2a.
Thumb
grip
Push
thumb
grip In
F
G
N
K


Find Your Products By Category
Please Login
