

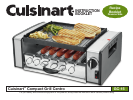
0
Owner's of the Cuisinart Gas Grill COMPACT GRILL gave it a score of 0 out of 5. Here's how the scores stacked up:

3
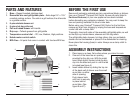
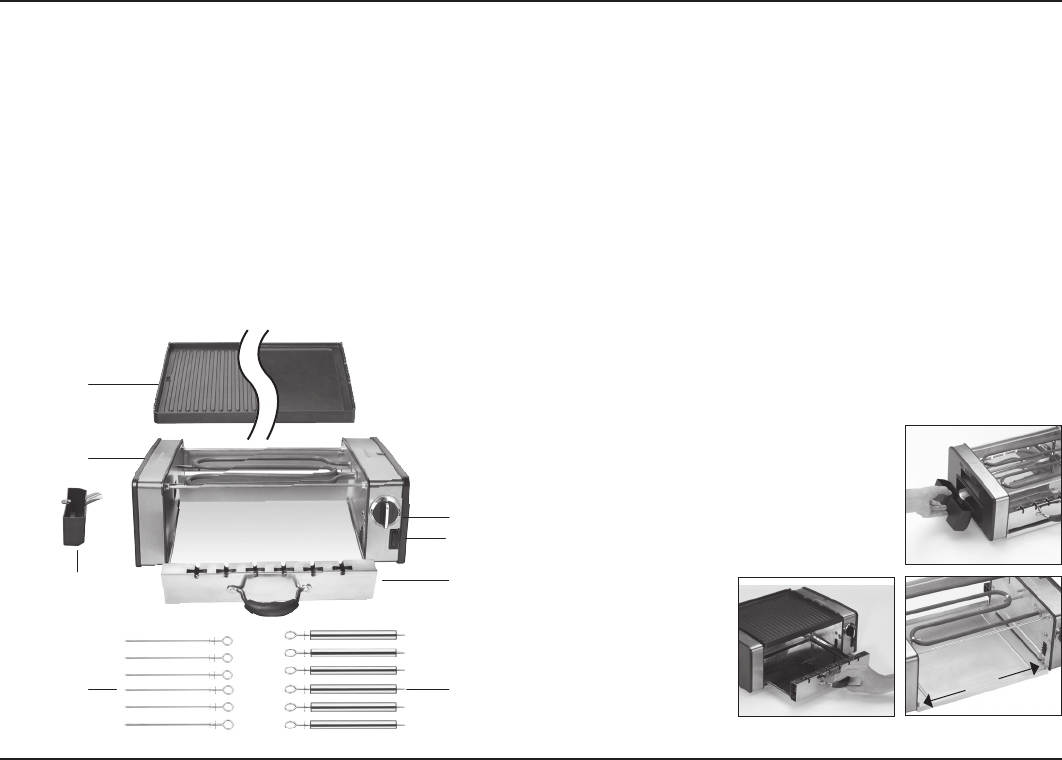
partS and featureS
1. Base – Elegant brushed stainless steel
2. Reversible die-cast grill/griddle plate – Extra-large 9½" x 10½"
nonstick cooking surface. One side is a grill surface; the other side
is a griddle surface.
3. 6-piece kebab skewer set
4. 6-piece hot dog roller set
5. Pull-out kebab drawer with handle
6. Drip cup – Collects grease from grill/griddle
7. Temperature control dial – Off, Low, Medium, High positions
8. Kebab motor control switch
9. BPA Free – All parts that come in contact with food are BPA free
before tHe fIrSt uSe
Remove all packaging materials and any promotional labels or stickers
from your Cuisinart
®
Compact Grill Centro. Be sure all parts (listed in
Parts and Features) of your new appliance have been included
before discarding any packaging materials. You may want to keep the
box and packing materials for use at a later date.
Before using your Cuisinart
®
Compact Grill Centro for the first time,
remove any dust from shipping by wiping the base and temperature
control dial with a damp cloth.
Thoroughly clean both sides of the reversible grill/griddle plate, as well
as the drip cup, kebab drawer, skewers and hot dog rollers.
The grill/griddle plate, skewers, hot dog rollers, drip cup and kebab
drawer can be handwashed or placed in the dishwasher for cleaning.
Never place the housing (base) in water. Always use a damp cloth to
clean this.
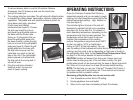
aSSembLY InStruCtIonS
1. Place base on a clean, flat surface where you intend to cook.
2. One end of the base has an opening
provided for the drip cup. With the metal
spout tilted slightly forward, slide the drip
cup into the base and push in until the tab
is locked (see figure A).
3. Insert kebab drawer by sliding the top rim
of the back wall of drawer over the small
round tabs on either
side of opening.
Push drawer back
until front is securely
in place behind
round tabs. (See
figure B and C).
3. 4.
A.
C.B.
1.
2.
6.
5.
7.
8.
TABS


Find Your Products By Category
Please Login
