
0
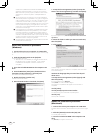
Owner's of the Pioneer DJ Equipment Pioneer DJ Equipment gave it a score of 0 out of 5. Here's how the scores stacked up:
5
En
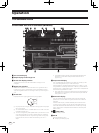
Before you start
! When the product exhibits a distinct change in performance – this
indicates a need for service.
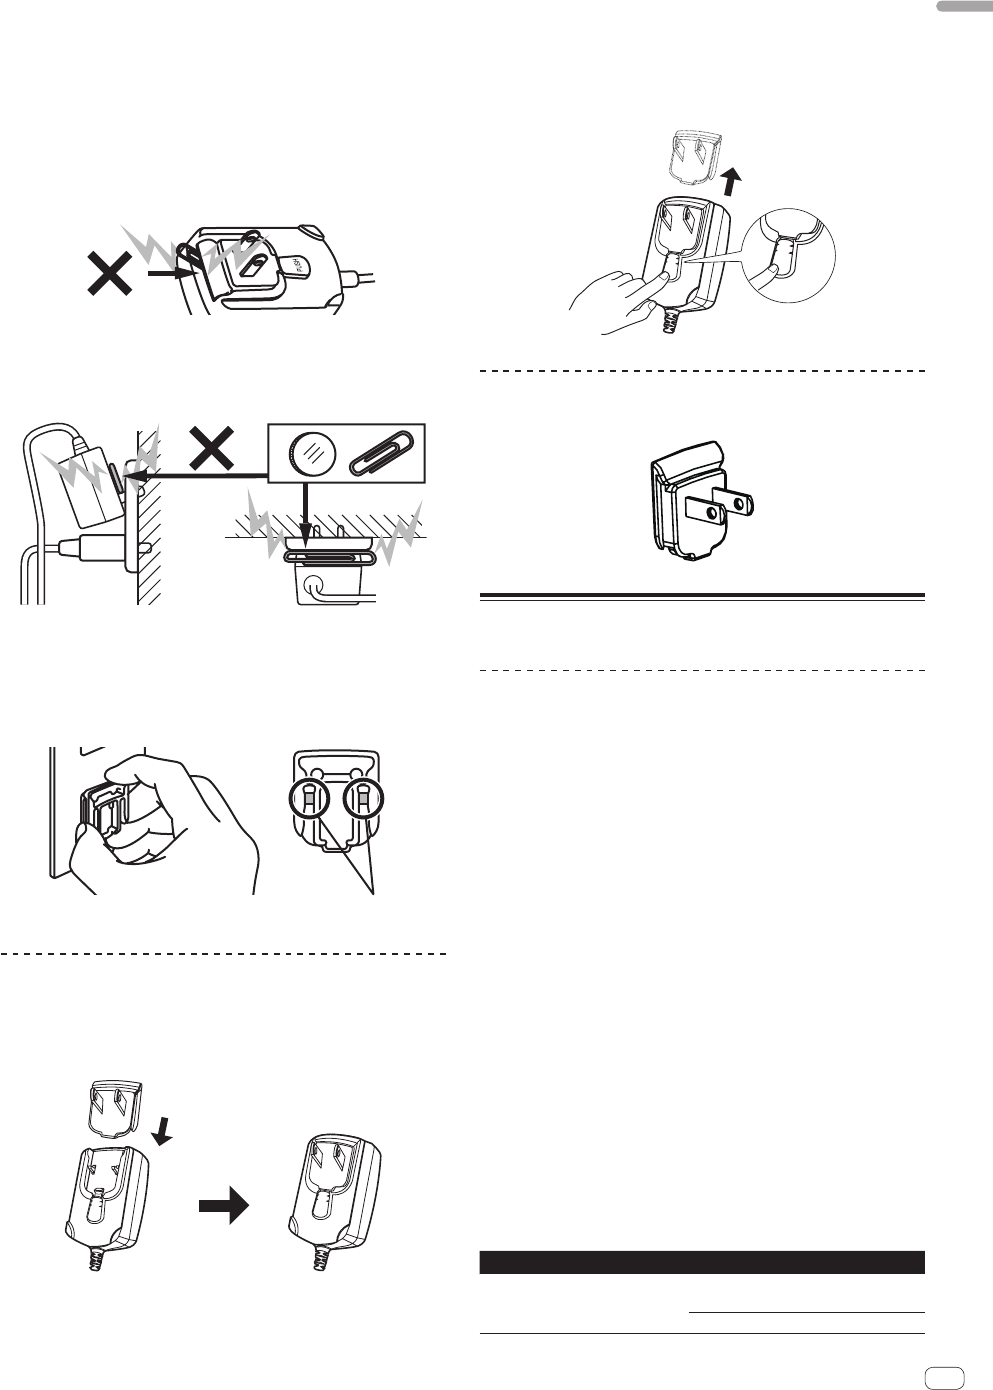
Check that there are no irregularities with the AC adapter or power plug,
then insert the power plug into the specified position of the AC adapter
using the specified procedure until a click is heard. For details, see
Mounting the power plug on page 5.
If there are irregularities with the AC adapter or power plug, ask your
nearest Pioneer authorized service center or your dealer to carry out
repair work.
! Do not use this unit with a coin, paper clip or other metal object
stuck between the AC adapter and power plug. Doing so could cause
a short circuit, leading to fire or electric shock.
! When mounting the AC adapter on a wall outlet, make sure there is
no space between the AC adapter and the wall outlet. Faulty contact
or a coin, paper clip or other metal object getting stuck in the space
could cause a short circuit, leading to fire or electric shock.
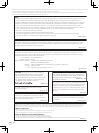
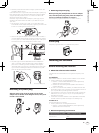
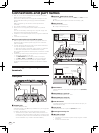
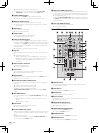
Coin, paper clip or other metal object
Sid
eT
op
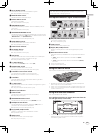
! The power plug could come detached from the AC adapter and
remain in the power outlet if someone trips on the AC adapter’s
power cord or if something hits the AC adapter. If this happens,
remove the power plug remaining in the outlet with dry hands, hold-
ing it as shown on the diagram below and without touching metal
parts. Do not use any tools to remove it.
Do not touch metal parts.
Mounting the power plug
Slide the power plug along the guide rails in the AC
adapter unit as shown on the diagram below, then press
in until a click is heard.
PUSH
PUSH
Removing the power plug
While pressing the [PUSH] button on the AC adapter
unit, slide the power plug away from the adapter as
shown on the diagram below to remove it.
Once the power plug is mounted, there is no need to remove it.
PUSH
PUSH
Power plug
The power plug shown below is included with this product.
Installing the software
Before installing the software
About the software to be installed
The software to be installed differs according to the computer you are
using.
For Windows
After the ITCH software is installed, the driver software is also installed.
! Carefully read the user license agreements below.
— SERATO — USER LICENSE AGREEMENT (“License Agreement”)
(Refer to About the ITCH software.)
— Software end user license agreement (Refer to About the driver
software (Windows).)
! To install or uninstall the driver software, you need to be authorized
by the administrator of your computer. Log on as the administrator of
your computer before proceeding with the installation.
! If you connect this unit to your computer without installing the driver
software first, an error may occur on your computer depending on
the system environment.
! If installation of the driver software is interrupted after it has started,
start the installation procedure over again from the beginning.
For Mac OS X
Only the ITCH software is installed.
! Carefully read the user license agreements below.
— SERATO — USER LICENSE AGREEMENT (“License Agreement”)
(Refer to About the ITCH software.)
Minimum operating environment
Supported operating systems CPU and required memory
Mac OS X 10.4.11
Intel
®
processor, Core™ Duo 1.8 GHz or
better
1 GB or more of RAM


Find Your Products By Category
Please Login
